by Barry and Cindy 1997 U270 36′ 3/1/2010
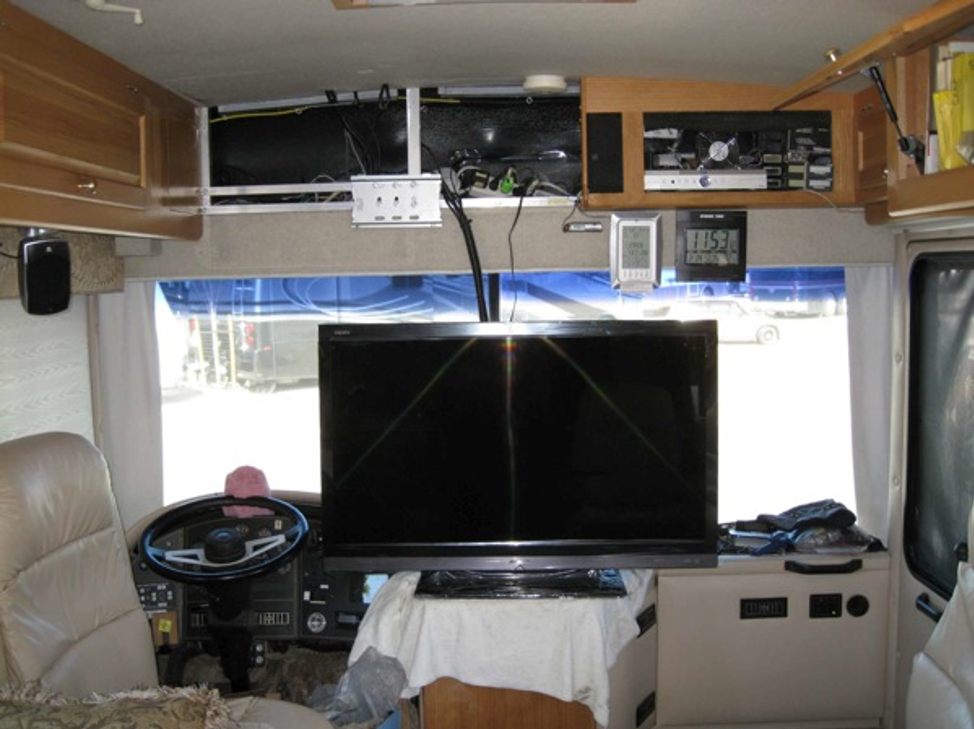
New Sharp 46” LCD TV sitting on the dash using the TV’s base. The TV sat on the dash for a week so we could get used to it and to finalize it was the right TV for the job. The previous Sharp 37” TV’s wall mount is still in place.
Shows the finished edge of the cut-off cabinet. Trim is a piece from the front of the original CRT TV box. The new wall mount is in place with new aluminum supports showing.
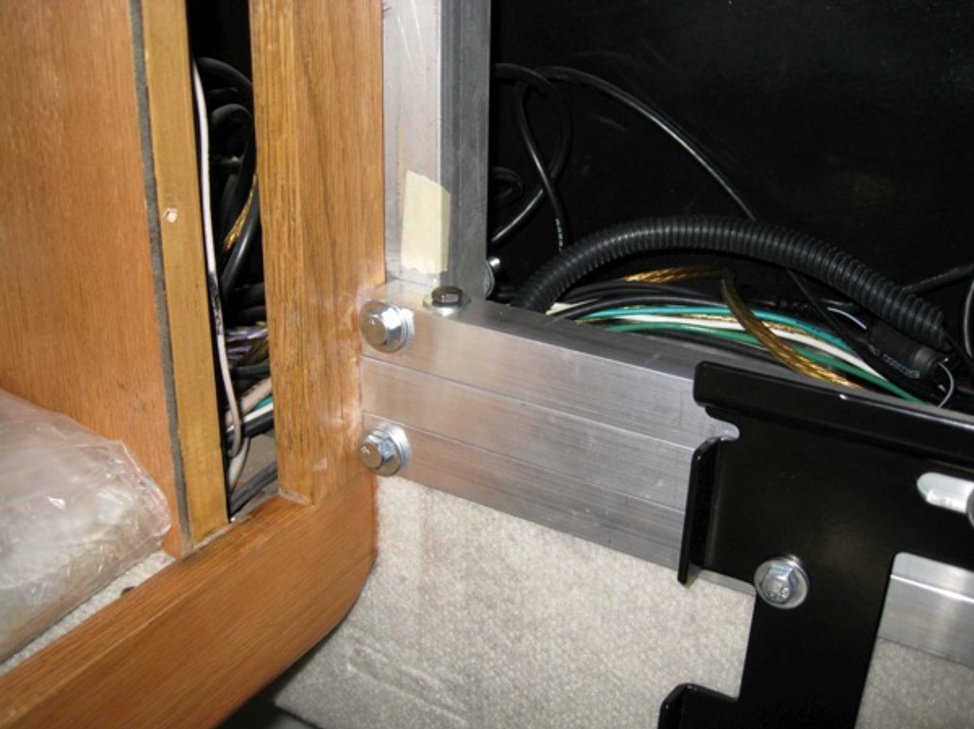
The left side of the new triple 1” square tubing bolted in place to the original framework. The top tube is bolted through the middle tube to the lower tube.
The right side of 1” tubes. Coach 1½” horizontal framework can be seen behind the lower support tube.
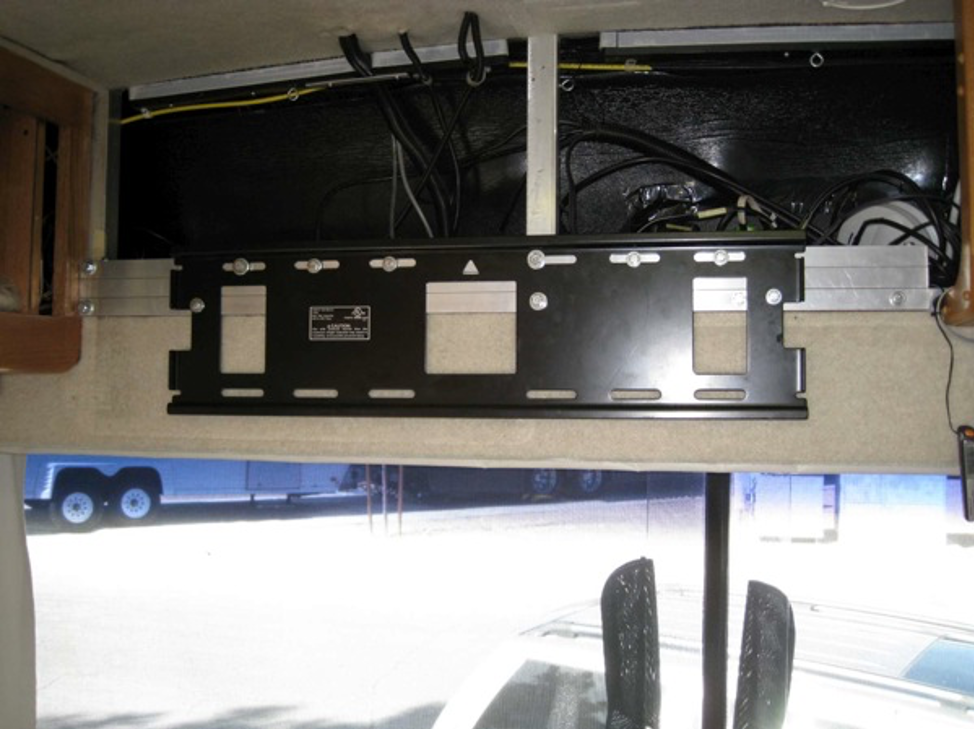
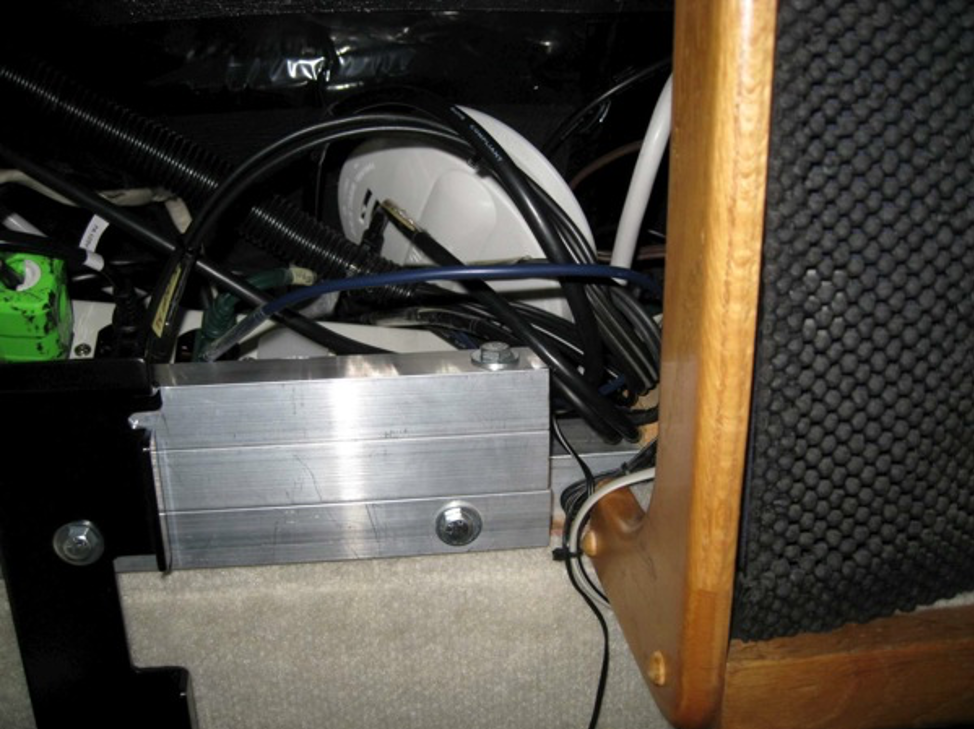
Wall mount firmly bolted in place to add 1” tubes. The center of the mount is also bolted through to the coach framework. The wall mount has 3 bolts into the coach framework. Uses 6 additional bolts to add-on square tubing. Tubing has additional 4 separate bolts into the coach framework.
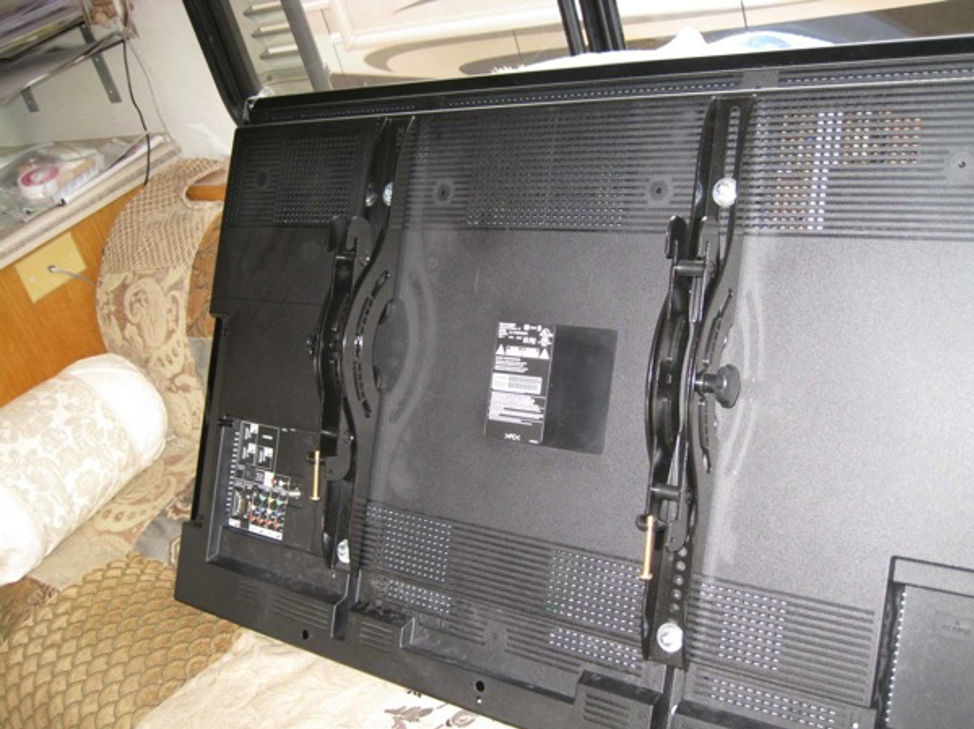
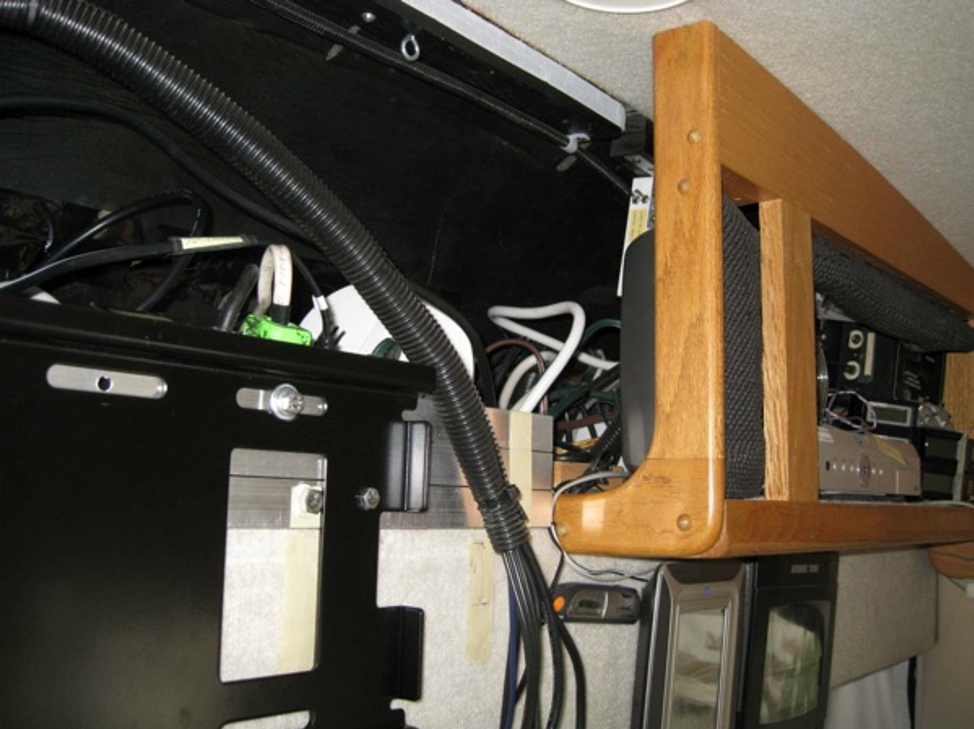
Heavy-duty tilt brackets bolted to the back of the TV. Note holes to allow for adjusting the height of the TV on the wall mount. Ceiling clearance space is needed to allow bracket hooks to “lift over” the wall mount edge.
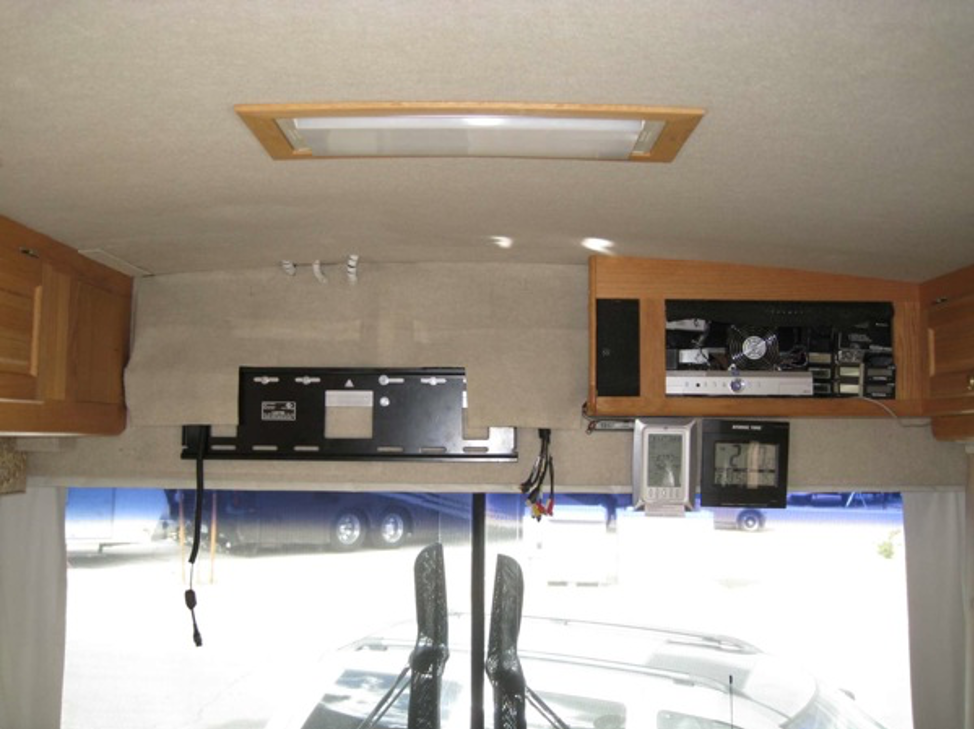
The finished wall mounts before TV is attached. Ceiling material was used to cover open space behind the TV to give the job a finished look. Self-stick Velcro was used to attach material. Original cables that come through the roof are covered in white wire loom. The open side cabinet hole is filled in with rectangular matching wood. The original black spray comes off the wood with steel wool. Small black paint on the ceiling is covered with a piece of new ceiling material Velcro’d on. No cover-up was made to hide the ceiling imprint from the original TV box. Satellite DVR receiver has a black roll-up vented front material to conceal equipment.
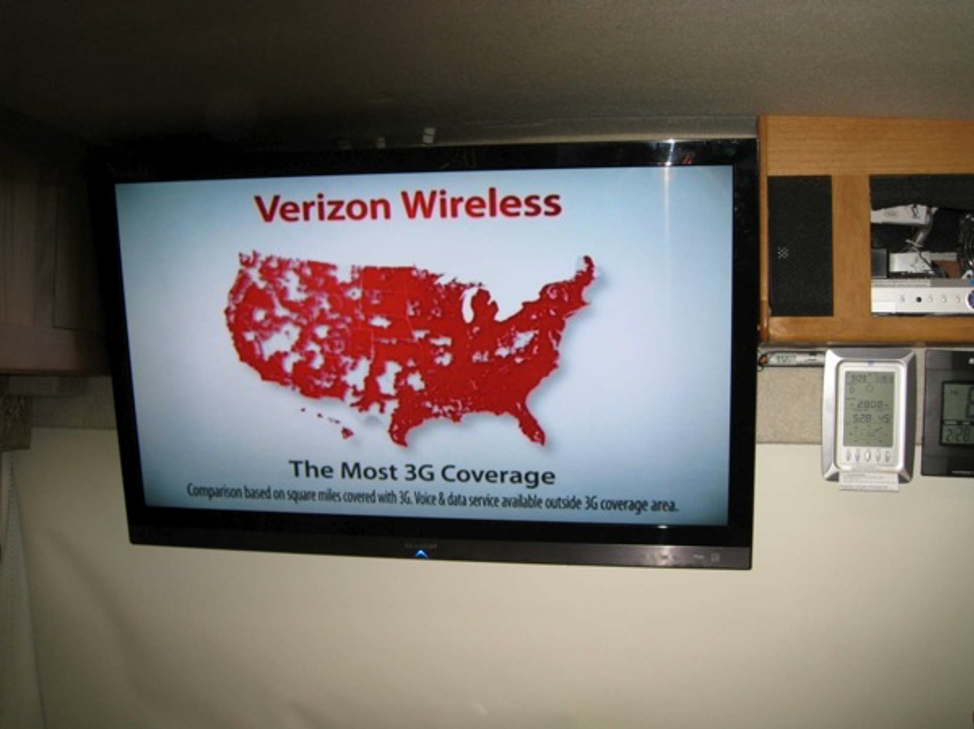
TV mounted and cables connected.