by Barry and Cindy 1997 U270 36′ 12/2/12
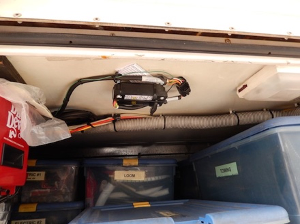
Replaced our original HWH level sensor with a new style electronic level sensor. It is mounted centered between front & rear axles and side to side on our big bay’s ceiling. I ran the cable to HWH control box above the house battery compartment.
The original level sensor was fastened to the floor under a kitchen cabinet and used mercury to sense when the coach was not level. HWH panel indicated level sometimes when we still off a little. I did improve it a little by adjusting the original level screws. HWH converted to the electronic level sensor, partly because of the originally used mercury.
After mounting new level, I just unplugged the original sensor, plugged in the new sensor and made a new power connection
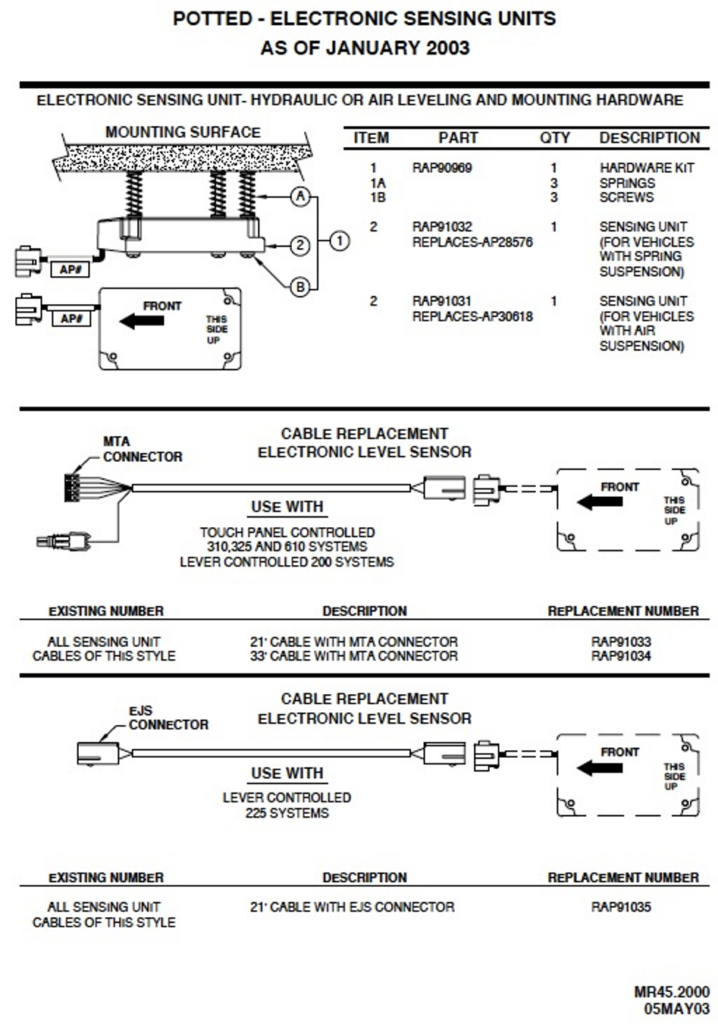
HWH parts RAP-91734 (cable kit) and RAP-91031 (sensor) cost $300 and also included AP-30631 (short 12-volt power harness) and AP-29299 (three bolts & springs to mount sensor).
The initial one-time adjustment is simple.
UPDATED: March 2014
We recently moved it to the center bay ceiling near the street side for access, so it can be tweaked without pulling out Joey Bed and crawling into the bay, which put coach off balance.
Ran cable to HWH control box above the house battery compartment
Unplugged original mechanical mercury sensor screwed to kitchen floor under cabinet
Plugged in a new sensor.
Power source needed for new sensor came from small bolt within HWH control box
HWH parts purchased
| RAP-91734 | $60.00 | cable kit | |
| RAP-91031 | $230.00 | electronic level sensor | (notes on box: S.U. , Potted , Air , 9) |
| Total incl tax | $300.00 |
Included:
AP-30631 short 12-volt wire harness: ring terminal to single-pole plug (plugged into sensor cable
AP-29299 three bolts & springs to mount sensor
Above cable, kit has 5-wire plug that plugs into sensor short cable plug
Level module power, with the ignition off:
Power is off when the HWH dash control panel is off and on when HWH is on.
Level module power, with the ignition on:
Power is on.
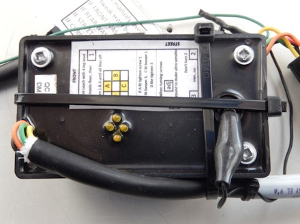
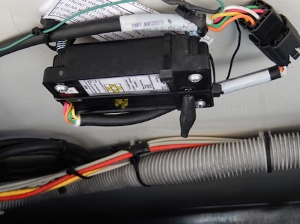
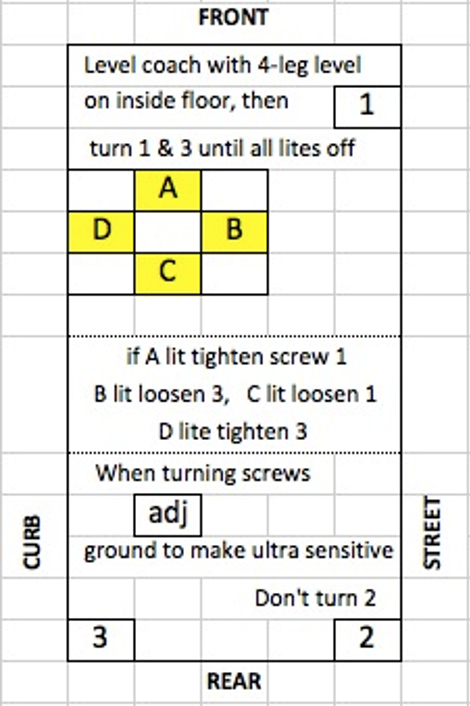
Mount with arrow forward and the top surface facing the sky
Remove adjusting enhancement cap to expose grounding wire
Grounding wire removes tolerance and makes adjustment ultra-sensitive
4-led lights are off when the sensor is level lights are on when the side is low:
A LED front
B LED left-street side
C LED rear
D LED right-curb side
Mounting screws with springs between sensor & bay ceiling
#1 – front mounting screw
#2 & #3 – rear mounting screws
Level motorhome with a 4-leg level on the inside floor
Turn on HWH
If opposing LEDs are lit, there is a problem with the sensor
IF LED A is lit, the front is low, tighten mounting screw #1
IF LED C is lit, the rear is low, loosen mounting screw #1
IF LED B is lit, street-side is low, loosen mounting screw #3
IF LED D is lit, curb-side is low, tighten mounting screw #3
do not change mounting screw #2
After manually leveling motorhome based on 4-leg level
Tweak HWH by loosening:
IF FRONT WAS LOW, loosen #1 screw 1/4 turn
IF REAR WAS LOW, tighten #1 screw 1/4 turn
IF STREET-SIDE WAS LOW, loosen #3 screw 1/4 turn
IF CURB-SIDE WAS LOW, tighten #3 screw 1/4 turn