The easiest and fastest way to identify Firestone Air Springs is by the part number stamped on the top plate. If this is not present, look for the bellows number stamped on the rubber bellows.
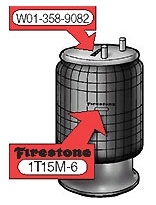
Firestone Air Springs W01-358-9448
100% of air spring assemblies are pressure tested before they leave the Firestones factory.
2 year / 200,000 mile warranty.
Firestone is the original designer of composite pistons.
Firestone rubber compounds have flex range through temperatures of -65 F to 135 F.
Firestone pioneered air springs.
- Firestone Bellows Number: 1T15L-2
- Goodyear Part Number: 1R11-150
- Goodyear Bellows Number: 566-22-3-021
- Ridewell Number: 1003589448C
- Replaces: EL Dorado 7089E000
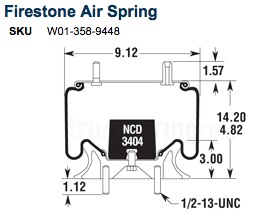
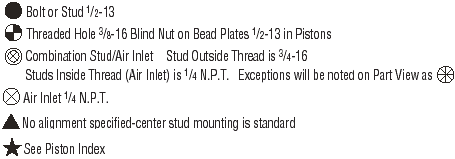
www.truckspring.com wants $164/ea for the Firestones
The 1T15LL-2 is the bellows only Firestone part number.
The bellow new number is 1T15L-2 (only one L) hope this helps.
The complete assembly part number WO1-358-9448
You can change out the bellows and save a few $. No matter which way you go the whole thing has to come out. That bellow is used in several applications with different endplates per individual manufacturer requirements. This is not just used in F/T suspensions with these endplates. Mike & Pamela 97 U320
Received this from Firestone regards replacing just the bellows and bead plate. “The W01-358-9448 is only available as a complete assembly including the piston. Firestone does not have a service assembly (the air spring without the piston) set up to sell using this bead plate, bellows, and bumper combination.”
The tech rep suggested that one option with a hard to find a slow leak is to remove the bag or bags, inflate them and dunk in a container of water. I may do that when replacing the shocks if I have to remove the bag to get at the shock, but for now, I have decided to use the old airbags until they fail. Jerry Whiteaker 96 U270 36′
Check with Foretravel for the airbags/springs
The correct part # for the last 5- 2002’s and later with a lifting tag (this is the one that holds downward pressure) is Goodyear # 9439 or WO1 358 9439 top bolt holes measures 6 1/4 and bottom 8 inches. I just installed this bag today on the l/rear tag. John Hughes
2003 Tag Axle Air Bag # 1R11-039

I replaced all 8 bags this summer on my 1994 U300 and Foretravel had the bag assembly that I needed.
Here is the Part # and price, 8 Air Springs (W01-358-9448) & Bellows (1T15L-2) @$176.38 each = $1411.04 (from Foretravel)+freight$181.88
Freight was to Montana.
As far as overloading the air spring/bag my understanding is 2 bags will support the front or back without overloading the bags.
In my case, the cords were showing in the lower curve of all the bags and some were breaking. There are only 2 layers of cords.
I did remove the fenders in order to get at the Top hidden nuts. Bob 94 U300SE 1/3/2010
Even though you have discovered air leaking from a bag, you might be able to drive it that way until you can get it fixed. Start the engine and put it in travel mode, then check to see how it is holding. Top to bottom of the airbag plates should be about 8″ plus or minus a little. If it is holding ok drive it a short distance and check again, keep an eye on the brake pressure gage to make sure that it is holding in the proper range.
I found a truck brake and clutch parts supply in Austin that was selling those airbags (at least he had one on display). I was looking for brake parts at the time. Also, I had a fender off recently for a fiberglass repair. When the fender is off you have good access to the airbags. Actually you might have to remove the fender in order to get at the bolts that hold the top and bottom of the airbag to the frame members as the nuts are inside the hollow rectangular steel tubing (open at the end). The fender is rather easy to remove, just remove the trim strip first which will allow access to the screws underneath that hold the top of the fender. The screws down the side are accessed by opening the doors. You might find that you have to run a putty knife between the fender and frame if it has been caulked. The fender is rather thin fiberglass, so be careful that you don’t break it. The weakest spot is right above the top of the wheel. The trim strip is aluminum and is easy to bend also, but 2 people can handle it. Jerry Whiteaker 96 U270 36′
The airlines are standard size and any compression brass fitting will work.
You can go to any hardware/truck/Lowes, etc store and buy a double-ended brass shutoff fitting. You could also buy a foot of air brake line.
Disconnect the existing hose in a bad airbag. Connect a new 1-ft hose to the bag. Connect another end of the 1-ft hose to shut off and existing disconnected hose to another end of shutoff. Shut off airbag and drive. Another airbag will have to carry the load of that side of the axle. Barry & Cindy 1997 Foretravel U270 36′
With all the talk of airbag replacement and knowing some of the mines showed some alligatoring of the rubber (especially the rear ones) I went out and took a look at what it would take replace one on my 1995 U-300SE 40′. The plate mounting studs are aligned fore and aft and are accessible on either side of the frame tube. It does not appear as though I would need to remove any of the trim to get inside the frame tube. I think I will buy 1 as a spare and keep it on hand in the event of a failure. Rick 1995 U-300SE 40′
I was able to get eight airbags ordered today for my 1996 U270. Re-verified part number with Foretravel to be sure it agreed with the info I had obtained from some of you. Apparently they use “Foretravel” numbers for everything and are hesitant to cross them over to vendor numbers.
I suggested that I didn’t want it cross-referenced but, I did need the number verified. Which he finally did, so the bags have been ordered from a local parts dealer and are coming out of Texas someplace very close to the Firestone plant that makes them. I do not at this point know who the supplier actually happens to be. I may find out later.
Bags will hopefully be in here by Friday and if not maybe Monday. I was able to get them for $168.00 each, tax included and no freight charge as they were coming in on a stock order for the local dealer.
Now the work begins. I will start on the failed side and remove the metal trim strip and then the fiberglass wheel well panel that covers the airbags. It seems that using Loctite Thread Sealer is a good thing to do when transferring the fittings from the old bags to the new bags. I guess a good second choice is Plummers Thread Sealer. JON TWORK 1996 U270-36
So far, I have the fiberglass off of the wheel well.
It was somewhat difficult due to the adhesive that they used on the sides to secure it in addition to the few screws that were installed. Thankfully, the area across the top was not attached with adhesive. Most of the removed screws were junk. Corroded and full of calk. Various sizes were encountered.
Tools that I used were, wire (really fine and strong) which I used to pull down through the adhesive.
Hacksaw blade used to fish the wire behind the fiberglass.
Very Flexible wide blade putty knives.
Gordy Muetz formed a 90* bend in one of them which works really well.
I was cautioned that the fiberglass across the top was fragile and to be really careful with it. It is, and I was. Hopefully, I will be able to put it back on in one piece.
Now that the fiberglass has been removed, it seems that it will be a fairly easy job to remove and replace the bags. We shall see. It is Sunday and I used today to purchase new screws, caulk, and some more putty knives. I am performing this bit of service in the Cocopah Casino parking lot and figured I would lay low today and not incur the wrath of the Indian gods.
Tomorrow I raise the coach to a maximum and install the stabilizer tubes and then begin the removal and replacement of the bags. Gordy’s stabilizer tubes are a little shorter than what I have heard other people using. They are about 6.25″ tall and the I.D. is 1.75″, the thickness is 0.25 and the material is Aluminum 6061/T6. Some I have heard of being over 10″ tall. Hopefully, these will be tall enough to get the job done.
Getting the left rear done is a priority as I really can’t move without replacing the forward bag, as it is leaking. If they kick me out after that one is done, I can probably find another location where I can finish installing ALL of the bags.
If we had raised the coach only about 4 inches the installation would have been slightly easier. We are placing the aluminum tubes on the large dimples on the suspension. We had to manually force the airbags down about 2 inches. It was a learning experience. Stay tuned for further developments. JON TWORK 1996 U270-36 1/10/10
We finally got the two left-hand rear bags replaced today.
The coach is sitting on the aluminum tubes. Very solid. The strange sensation inside the coach. Minimal movement. Weird!!!
The first airbag was a learning experience. Gordy Muetz was doing most of the work and we were careful to NOT do something that would cause us problems at the time OR later on in the process.
Wrench selection was somewhat complicated due to the clearances involved. Also to our joy, most of the nuts have not been previously tightened excessively, so they were relatively easy to remove.
A 5/8″ wrench is needed for the airline connection nut. It is nice to know, that we feel we can use the existing fittings and ferrules as there is a DOUBLE sealing situation. Under the fitting is a standard 3/8″ Ferrel but, after that, a rubber “O” ring is over the line so, there is double leak protection. When the big nut on the airline was removed, no air leaked until Gordy pulled the tubing out of the fitting. We think we will NOT need new ferrels and seals.
The airline “L” is removed using a 15mm wrench, the longer the better. A tubing wrench that is substantially stronger would be a better choice. We didn’t have one. A large Cresent wrench worked for us to break it loose. A 9/16″ wrench was used to remove the fitting after it was broken loose.
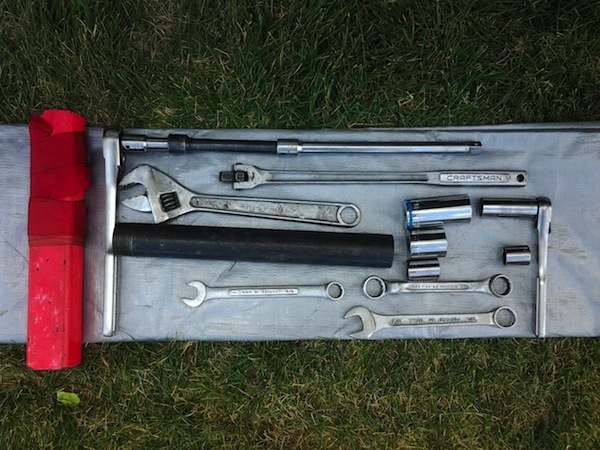
A 3/4″ drive breaker bar, with a 1 1/8″ socket was used to remove the large nut where the airline connects. It will be easier if you have a rachet that is skinny as access is limited and we didn’t have one or an arrangement that would fit. Used a crescent wrench to finally remove it. The other bolts were removed with 1/2″ drive and an assortment of extensions out to about 24″ and removal was done laying on the ground and reaching up vertically with the 3/4″ socket, extensions and initially with a breaker bar. A ratchet came in handy to finally remove the nut speedily.
The first bag took some time to do due to tool selection.
The second bag went quite quickly as we NOW had an idea of what we were doing. Tomorrow, we will do a little fiberglass repair to the bottom of the fiberglass panel we removed. There was a strut (12″x1″x3/16″) that was not connected to the bottom of the fiberglass as a stabilizer, as it had torn out of the fiberglass, leaving a large hole. We will clean up the area and rebuild it using a patch kit. We will straighten the strut and re-install when the panel is re-attached.
We hope tomorrow, to get the driver’s side rear fiberglass panel removed and those two exposed airbags removed and replaced.
Two down, Six to go. The front airbags look like they will be much tougher. The fiberglass on the passenger side next to the access door looks like it might be difficult. The bags on the driver’s side shouldn’t be too bad. We will see. JON TWORK 1996 U270-36 1/11/10
Potential problems to look for.
Raise the coach to maximum height and then turn off the key and then go outside and look at the bags. Run your hand slowly and CAREFULLY around the bag at the top, as this is where most of the wear will show up. If the bags look good and you don’t find a lot of granular rubber flaking off of the bag and you see no sign of frayed cords, don’t worry. If you see frayed cords, I would suggest changing them. JON TWORK 1996 U270-36 4/7/10
Look for areas on the bags where the rubber has worn completely down to the
nylon cords. On mine, the wear was about 1-1/2″ below the top plate on the forward bags, right at the “crown” of the curvature. Also, with a flashlight go under your coach and look at the inner side of each bag. I had a 1 1/2″ gash in one bag that couldn’t be seen from standing outside. It was down to the cords but hadn’t penetrated the 1/8″ rubber inside of the cords. If all you see are weathering checks (cracks), no cords, they’re probably good for a while more. My bags were 19 years old. Don Hay ’92 U-280 4/7/10
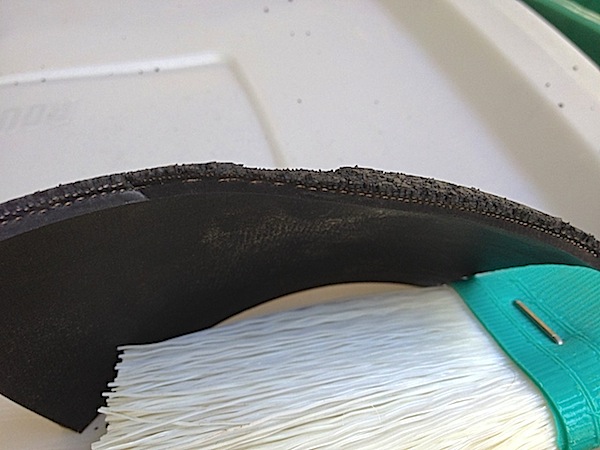
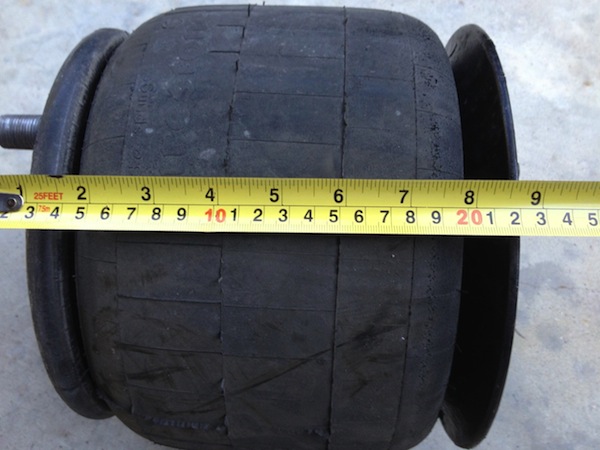
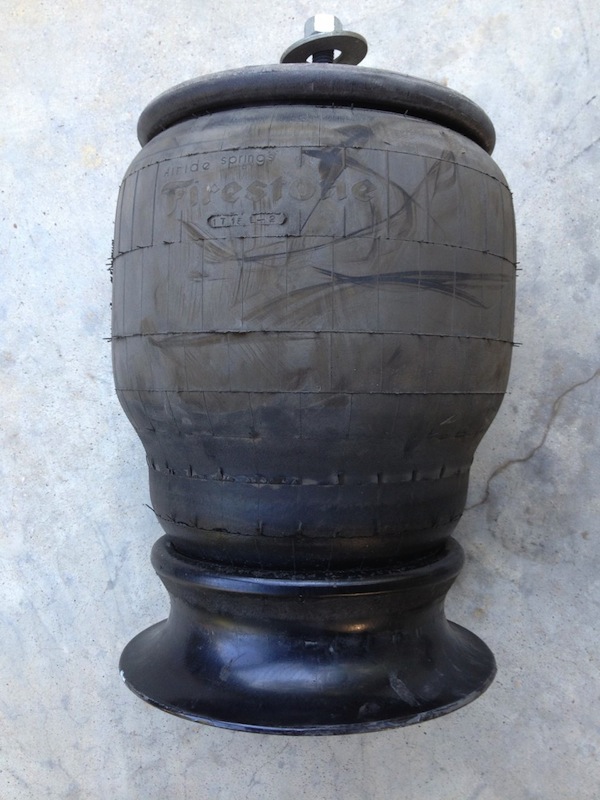
Given the age and miles and sunshine our coach has seen, I asked last year and now that the airbags were closely inspected. There was this year some crumbling appearance at the bottom of some bags and some loose material. Upon removal of the bags, it was found that there was more deterioration on the part that turned under than was evident when the bags were installed. It feels as though about half of the thickness was crumbling and thus missing. There are two very visible fabric plies layers and the erosion was through the first fabric ply layer. It seems wise to have changed. If there are 16 layers of materials in the bag, ours was through about 8 in this area.
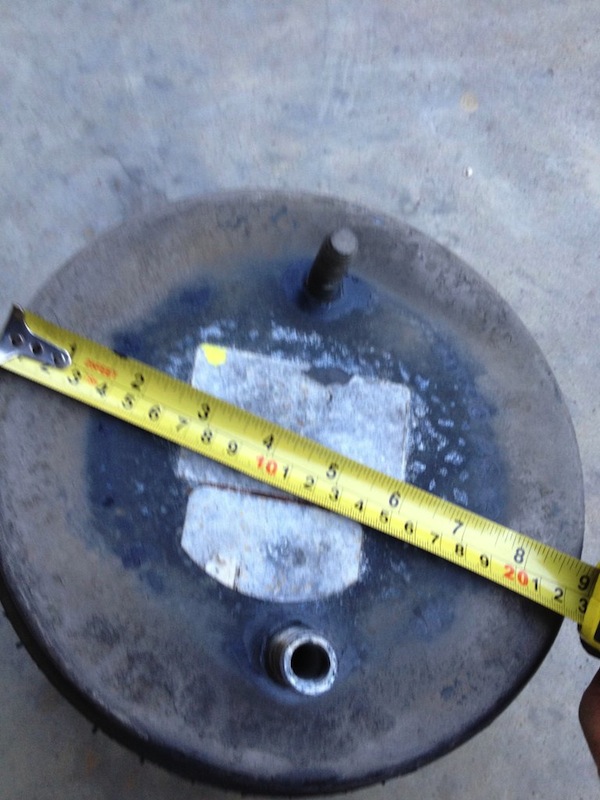
The interesting part though is this. The airbags acted as reservoirs for desiccant dust. When the bag is off of the coach, you can step on the top and compress the bag and gray/white dust comes out the airbag air inlet/exhaust hole (see photos). Interesting. Though my dust problems seem resolved from a year ago and considerable pain getting there, there was still dust in the system that could move about. Maybe it will be an added benefit to have changed the bags.
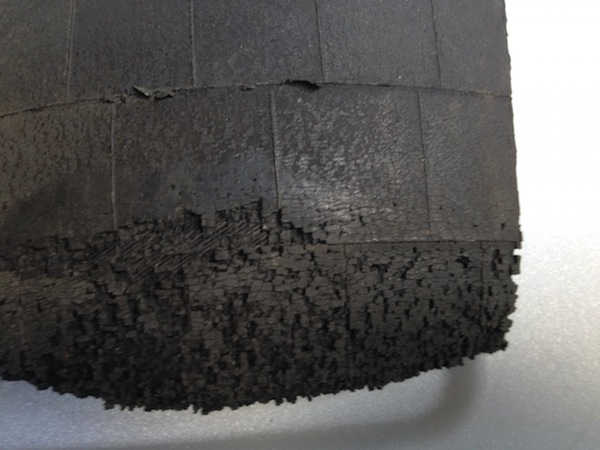
by Mike 2001 U320 40 9/29/13
I just replaced my 2 left rear ones this morning on the road in the campground on my 1995 U-300SE. Start to finish was 1 1/2 hrs. On my coach, I did not have to remove the side panel. The first thing I started doing about 2weeks ago was to soak all the bolts with PB Blaster. Did this every other day then cracked all of the nuts free before attempting the complete job. Being on the road I did not want to start in the campground unless I knew all the bolts would come off. Extended the coach to the max height and put my 11″ safety blocks in place all around. Then dump the air.
The only socket that I did not have was a deep 1 1/8 with 1/2″ drive, best if this is 2 1/2″ long but I was able to use 3″ with the breaker bar. As it turned out I would not have needed it because the nut broke free with a crescent wrench. 3/4″ box wrench, 8″ long and a 5/8″ combination wrench along with about 18″ of extensions for your 1/2″ drive will make getting the lower nuts off a bit easier. You will need some pipe thread sealant for the air fitting. When reinstalling the airline I use a light film of silicone paste.
Air spring Part no. W01-358-9448
Bought airbags at Truck Parts, Trailer Parts, Bilstein Shocks, Firestone Air Bags, Timbren out of MI $156.00 free shipping
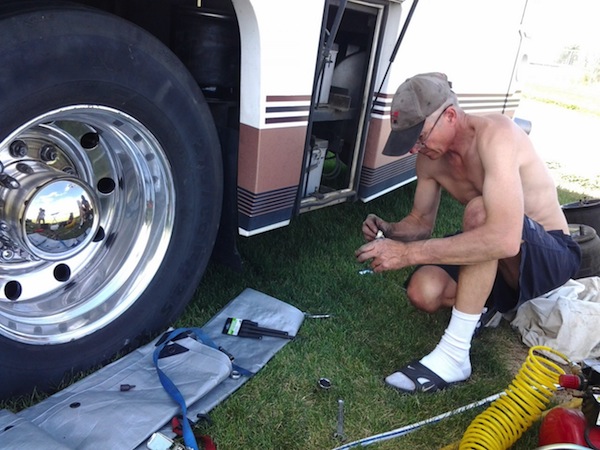
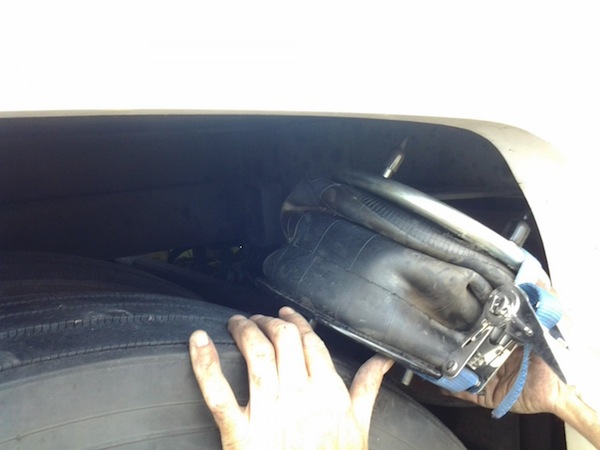
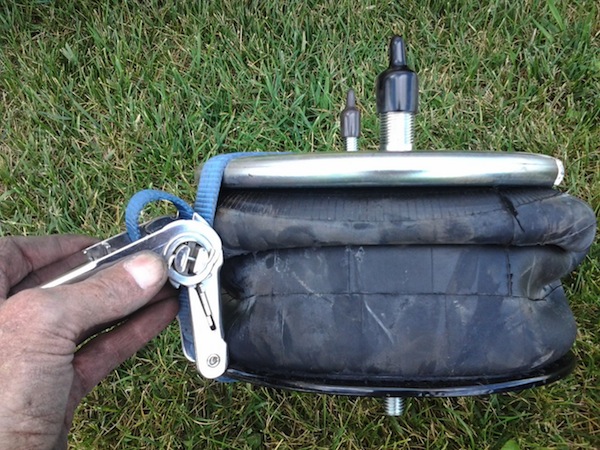
Keeping the info together. When replacing the airbags it is possible that one of the 90* brass elbows will break or be damaged. I suggest having a couple of new 90* assemblies on hand. These are available at the local truck parts shop. Also when reassembling the 90* fitting into the airbag use an anaerobic pipe sealant to avoid leaks. Because you need to have the 90* fitting properly aligned you may not be able to tighten the fitting enough to avoid leaks and get the correct alignment.
I replaced the rear airbags on my 1996 U320 about six months ago when I noticed two layers of cords exposed on one bag. Firestone W01-358-9448 (complete assembly).
Just the bellows (Firestone 1T15L-2) are available and it would not be difficult to attach the bellows to the old puck. I could not find a source for just bellows and bought assemblies from SDTRUCKSPRINGS.COM for $148 each including shipping. Check their coupons on the home page. I ordered two at a time to get a maximum discount because they did not respond when I requested info on applying two coupons to one order. I could not find these airbags available on eBay.
I will replace the front airbags this winter when I will be in California.
Jon Twork submitted a step by step description which is available on Foreforums. Jon removed the panels covering the wheels but I managed to complete the replacement without removing those panels. I also installed a brass “T” with a Shrader valve for each pair of airbags.
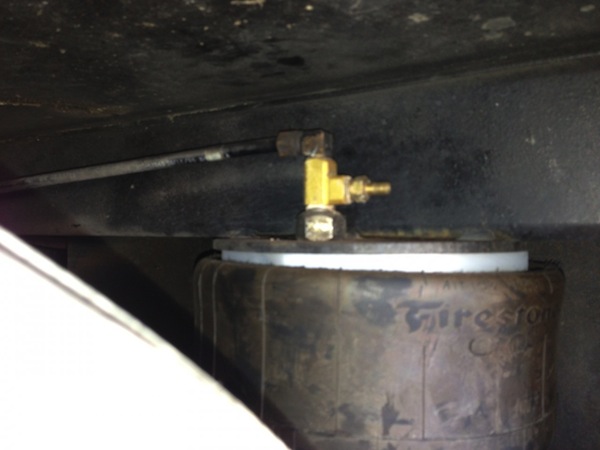
I plan to install an access panel in front of the driver front tire in the Genset fan housing to allow easy access to the airbag fittings on that side. I may have to remove the panel covering the passenger front tire to get access to the passenger front airbag fittings but may put an access door in the entry step well.
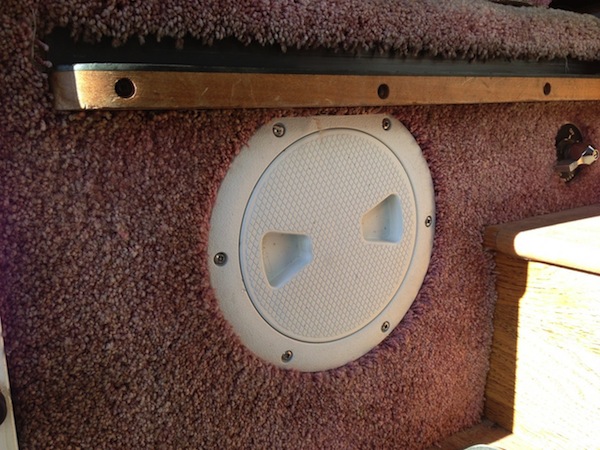
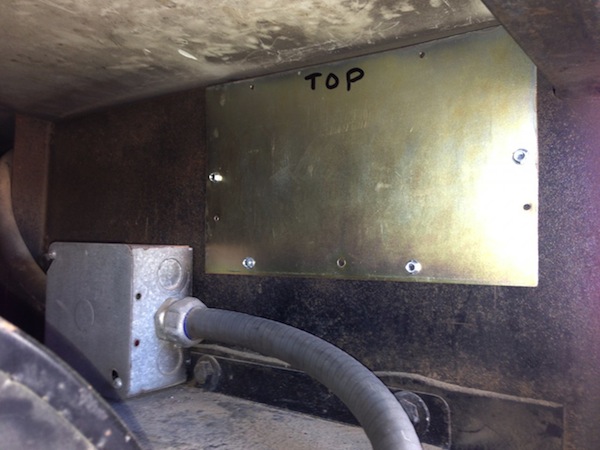
By the way, the pressure in the front airbags when traveling is about 45 psi while rear airbags require about 75 psi.
I used Wrenches as follows: 1 1/8 for the large nut on hollow air input bolt, 3/4 for nuts, 5/8 for air hose nut, 9/16 for brass fittings.
On the rear suspension: I was able to remove the front airbags between the tire and the wheel cover panel with the safety blocks in place. The rear airbags required additional lift using a hydraulic jack to provide room between tire and wheel cover panel.
Airbag replacement is awkward but doable. Wyatt Sabourin 96 U320 40
When FOT replaced my airbags they showed me that they had to cut a hole by the entrance steps to access the airbag. In my case, they removed the carpet and drilled a small pilot hole to confirm where they needed to drill the three-inch hole. It was a very bad design to place the airline feeding the airbag on the front side of the support. They should have placed it to the rear so you could access the airline at least. They sealed the hole and replaced my carpet. Brad 2000 U320 40′
The new bags were delivered and installed on my 1999 U320. Not a hard job, just very hot outside. A short 1/2′ offset ratchet really helped on the front upper nuts.
Will do the front 4 later on this fall once the temperatures cool off. Not looking forward to removing the front fenders. May do what Wyatt Sabourin suggested above and put in an access port in the stairwell and generator well. Dick & Sue 1999 U320, 36′
I had to jack our U300 up with a 10-ton jack to install the new airbag. I was concerned about the jack possibly slipping off with me underneath, especially since I had to jack it up pretty high. I welded up a couple of simple tools to slip between the frame members and adjusted them up after every 20 pumps on the jack handle. I am going to weld on a couple of tabs to better locate the safety at right angles and in the middle of the frame tubing. In the case of jack failure, there is no danger to life or limb.
Note: after an airbag failure, even capping the hose may not allow the coach to be driven. You have to check carefully the clearance between the top of the tires and the wheel well.
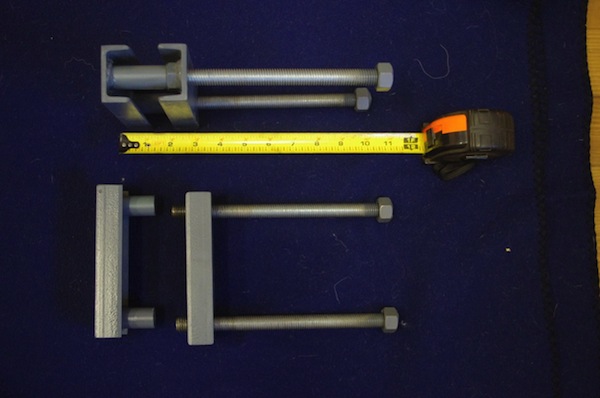
The other photo shows the hardware store adapters I bought to cap off the air hose to drive it. In practice, I just used the brass cap at the end of the U300 90 degree fitting.
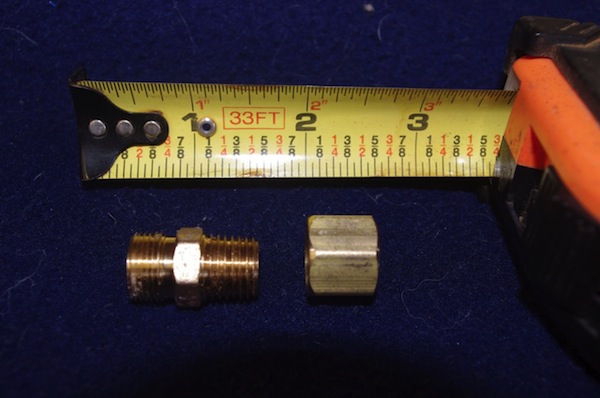
No need for fender removal. For the hidden nuts, use a very short double box combination 3/4″ or 19mm. Unless you have a long “crows foot”, they are too short. Using two 1 foot 1/2″ or 3/8″ extensions quickly remove all the bottom nuts and then with a matching Allen drive, connect to the short combination and loosen the nut enough to remove by reaching up with fingers or using the short combination with your hand.
Another option would be to cut off a 3/4″ combination at about the 4-inch mark and weld on a 3/4″ nut. You could then use a regular socket to access the visible nut loosen the top hidden nut. The nuts are not on too tightly so it’s an easy job with only road debris that is in the threads slowing the process down slightly.
On the fronts, start the engine and turn the steering wheel so you have the maximum clear area near the bag you are working on.
Tip: soak all studs and nuts with penetrating oil the night before. Buy a new set of the 3/4″ nuts and washers before you start (matching the threads). The bags don’t come with new nuts. You can clean up the large existing nut on the stud with the air connection. When you are already with ducks in a row, leave all the black vinyl caps on the airbag studs with the exception of the air supply stud. Place the bag on the ground and compress it with your knee and while compressed, put the vinyl cap back on the big stud. It will seal the stud and the bag will stay compressed. You can easily move it into position then. I like using a box end better than an open-end as they can’t round off the nuts.
They make a long special wrench that makes a 90-degree turn and will extend down a foot or so. Easy to connect to that tool and loosen the hidden nut.
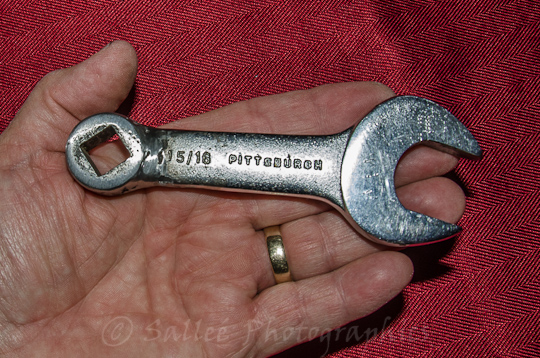
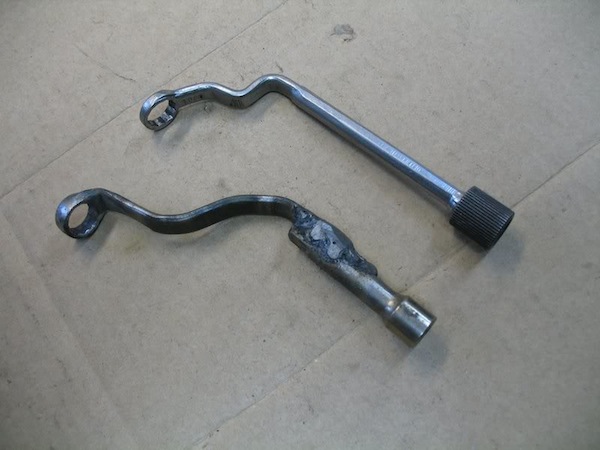
Make sure the rig is secure before crawling under! I am sure you will but have to say it.
Don’t take off that fender!!! Pierce, Gaylie 19’93 (94) U300/36
They’re something that you need to realizes about our ’91 coaches – they were the last year of 8′ wide coaches the for U280 and U300 models.
As such the air springs are tucked up against the fender and make access harder than on ’92 and later models. I couldn’t see a way to do it without removing the fenders – but then I didn’t have Pierce’s nifty tools either. I removed the fenders and took the opportunity to clean up, repaint and caulk the areas that difficult to get to with the fenders in place. Yes, the trim piece is a bummer. They do sell silicone remover at home improvement stores but it just weakens it – doesn’t really remove it. John & Tina Fitzgerald 1991 U300
Nearly three years ago I had a leak in the passenger side front, front bag. I remember blocking off that line and drove several miles with the one bag holding that corner. I took the fender off to get at the work that needing doing… So add some good silicone to your supplies. And spray painted the wheel area since it was open. The bag change is not a tough job. Lewis Anderson 1996 U270 36′
I got around to the airbag replacement today. It turned out to be harder than I thought.
First, I plugged the air line to the leaking bag hoping the remaining bag could lift the right rear so I could place blocks under the frame rails, no dice.
I had to use my smallest bottle jack (2 ton)between the frame members and try and raise the frame enough to get the bag in and out. The jack strained but got me about 7″ to work with and wood blocks between the frame rails.
I did find a way to get to the hated front top airbag nut. I used a 3/4″ratcheting wrench. The other end of the wrench was 5/8″. The 1/2″ drive on a long breaker bar was able to fit inside of the 5/8″ end of the ratchet wrench. I was able to bring the handle of the breaker bar into the wheel well where I could smack it with a hammer( it resembled an L). It only took a couple of blows to break the nut loose. after that, I was able to reach in and push the ratcheting wrench a click or two at a time with my hand. Too bad the threads are soooooo long, It took forever to crawl the nut off.
My next problem is there is not enough clearance to get the old bag out between the fender and the tire. I will attempt to collapse the old bag together tight tomorrow and try again, otherwise, I will just cut it in half ( I wanted to examine it so I avoided butchering it).
Lon 1995 U320C SE 40′
Cost to date:
8 W01-358-9448, Firestone Reversible Sleeve Air Springs @ $155.71 each
plus 74.74 tax (shipped from Michigan to Michigan) $1,320.42
New nuts from Fastenal (8-3/4×16, 24-12/13+lock washers) $27.37
Labor & materials (to install 4 on rear axle) $382.00
Total $1,729.79
In Inventory:
4 W01-358-9448 with fasteners to be installed (probably at FOT)
Interesting installation:
I have read many of the posts, looked at ingenious tools, and pondered how to get to the hard-to-get-to nuts.
These are the ones on the other side of the bag.
The young fellow at Hilltop RV in Ishpeming, MI contorted, tugged, ratcheted and was making small progress.
Finally, he asked, “Can I just cut the studs off the old bags?” Being the kind of fellow I am I said “Sure!!”
He would get a little slack on the ‘hidden’ stud, get the upfront nut off and then proceed to use his saws-all to take out the one he couldn’t quite reach. I also took care of the heavily rusted air supply stud. Elliott Bray 1996 U295 36′ 9/20/13